Spicy Tomato Chutney and Eggplant Pickle

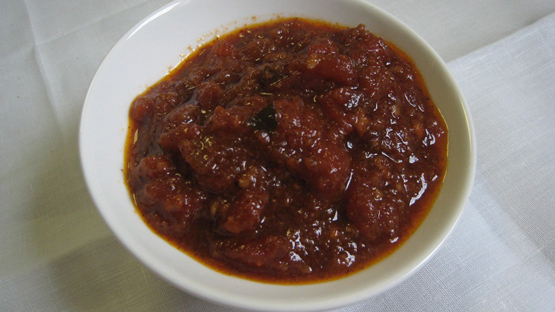
cooked tomato chutney flavoured with Indian spices in a white bowlThe past Saturday was “Can It Forward Day“- a day co-inspired by Canning Across America to get people preserving the bounty of the seasonal harvest.  I was inspired to make a couple of Indian flavoured items to put away for a late date: a slightly spicy South Indian style tomato chutney and a sweet and sour (anglo-indian style) eggplant pickle.

Before moving to India I had tried a few of the store bought mass produced pickles. I found them coated in too much spice and was unsure of what they should actually taste like. I was also naive in their purpose on a thali and their influence within an Indian meal.  I was an achar (pickle) novice.

Over many meals and visits to the markets I eventually learned a few things about pickles:

  • their primary function is to awaken the appetite and a swaadisht achar can make a seemingly bland meal explode with flavour
  • pickles only need to be consumed in small amounts (ie a tablespoon or two)
  • no two pickles are the same- each region and each family will have their own recipes and manner of preparing and using a pickle
  • visit any market (and many homes) and you will see earthenware jars filled with a variety of homemade achars and chutneys- this is a burgeoning cottage industry much like the jams, jellies and pickles found throughout country stores and fine food shops in North America.

If you are unsure of how to properly can I suggest you check out either Canning Across America or Food in Jars as they are great sources for all things canned.  It is not too late for you to do your own canning. I hope that there recipes inspire you to either reproduce them or at least get you into the kitchen to prepare a family heirloom pickle or chutney.

If you do not want to preserve each one should keep for a couple of weeks, well covered in a refrigerator.

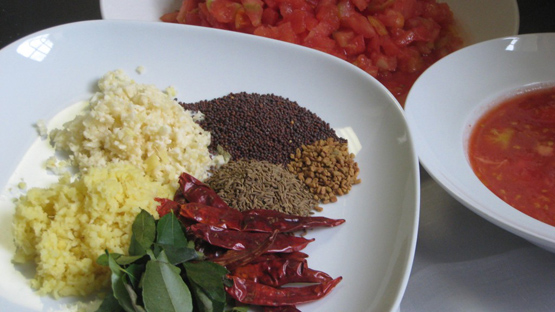
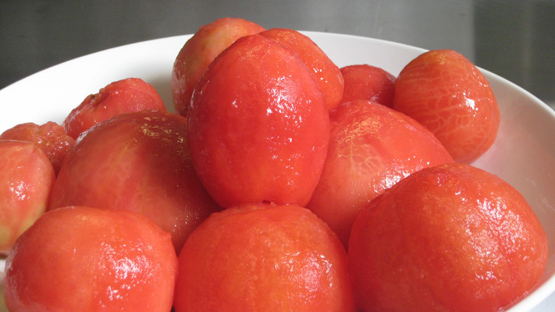
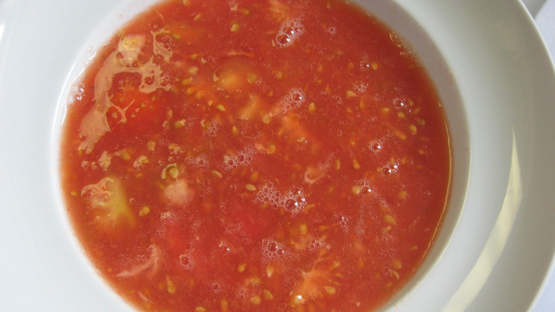
Ingredients for Indian spiced tomato chutneyPeeled tomatoes in a bowlcrushed tomato pulp in a bowl

Tomato Chutney
Serves: makes 3-250 ml jars
 
Ingredients
  • 2 kg ( 4 ½ lbs) tomatoes
  • ¼ cup ginger, finely minced/puree
  • ¼ cup garlic, finely minced/ puree
  • 2 branches curry leaves (about 20 leaves)
  • 6 tablespoons vegetable oil
  • ¾ cup malt vinegar
  • ½ cup sugar
  • 2 tsp salt
  • 4 tsp mustard seeds
  • 4 tsp cumin seeds
  • 1 tsp fenugreek seeds
  • 10 dried red Kashmiri chillies
Instructions
Bring a large pot of water to boil. At the stem end of the tomato cut out the core. Make a light X marking in the bottom of the tomato. When the water has boiled blanch the tomatoes for 10-15 seconds and remove to a cold water bath. Peel off the separated skin. Cut each tomato into quarters and over a bowl with a sieve use your fingers to remove the pulp and seeds from the tomatoes. (I like to do this so that they are no seeds in the final product. If you do not mind having the seeds in the chutney omit this step). Save the pulp and discard the seeds. Chop the tomato quarters into a rough 1 inch dice.

In a coffee grinder, finely grind the mustard, cumin, fenugreek and chillies.

In a large heavy bottomed saucepan heat the oil over medium heat. When hot add the curry leaves and cook for 10 seconds. Add the ginger and garlic pastes and cook for a couple of minutes until the mixture is light brown. Toss in the ground spices and cook for another minute or two. Add in the tomatoes, pulp, vinegar, sugar and salt.Bring the mixture to a boil and then reduce the heat so that you have a medium simmer.

Every 10 minutes or so give the mixture a good stir so that it does not stick to the bottom. Let the mixture cook down for close to an hour or until it has a jam like consistency.
Bottle.

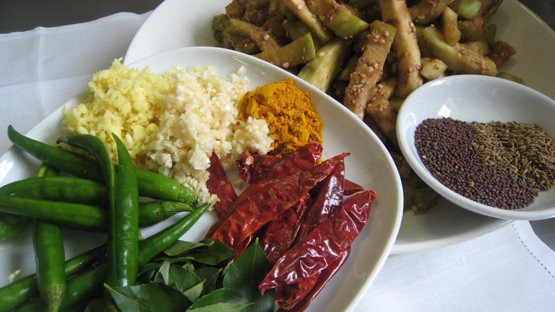
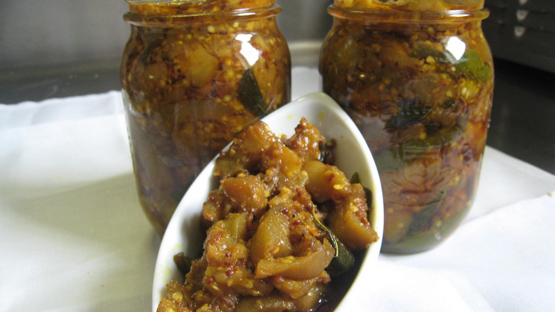
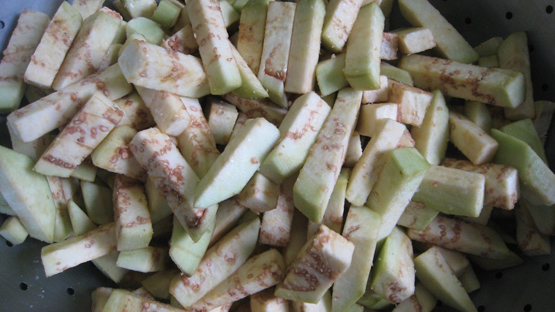
Cooked anglo Indian eggplant pickle in a bowl and glass jarsslices of peeled and cut eggplantIngredients for eggplant pickle, Indian style: eggplant, green chilies, cumin seeds, red chilies, garlic, ginger, turmeric
Anglo Indian Eggplant Pickle
Serves: makes 2-500ml jars
 
Ingredients
  • 1.5 kg eggplant
  • 1 tbsp salt
  • 1 cup vegetable oil
  • 3 branches curry leaves (about 30 leaves)
  • ¼ cup garlic, minced
  • ¼ cup ginger, minced
  • 8 green cayenne chillies, slit
  • 2 tsp mustard seeds
  • 2 tsp cumin seeds
  • 10 dried red Kashmiri chillies
  • 1 tsp fenugreek seeds
  • 2 tsp turmeric powder
  • ½ cup malt vinegar
  • ¼ cup sugar
  • 1 ½-2 tbsp salt
Instructions
Peel and cut eggplant into baby finger size pieces (1 X 4 inches). Place in a colander and toss with 1 tbsp salt. Place a weighted plate or bowl over it (I like to use a large can or two of tomatoes) and place in a sink or in a larger bowl for at least one hour. Dark bitter juices will be released from the eggplant. Try to gently squeeze out some more liquid from the eggplant.

In a coffee grinder, finely grind the fenugreek seeds and dried red chillies.

In a large heavy bottomed saucepan heat the oil over medium heat. When hot add the mustard seeds. When they begin to pop add the cumin seeds and curry leaves and cook for 10 seconds. !Add the ginger, garlic and green chillies. Cook for a couple of minutes or until the mixture is light brown. Toss in the turmeric and ground spices and cook for another couple of minutes. Add the eggplant, vinegar, sugar and salt. Reduce the heat to low and cook the eggplant for about 10-15 minutes or until done. The eggplant should hold its shape and not become a mushy mass. Adjust seasonings if need be. Bottle.

NOTE: This was originally posted on my blog India On My Plate on August 16, 2011

Tamarind Chutney

Also known as tamarind chutney or saunth this tart, spicy and slightly sweet sauce is an essential ingredient to spoon over various street chaats or to serve as a dipping sauce for pakoras or samosas. The tamarind sauce will keep refrigerated for several weeks in a well sealed glass jar.

Tamarind Chutney
Serves: makes about 2 cups
 
Ingredients
  • 7 oz tamarind block
  • 2 cups hot water
  • 5 tablespoons jaggery (or brown sugar)
  • 1 ½ teaspoons ground ginger
  • 1 teaspoon cumin, roasted then ground
  • ½ teaspoon fennel seeds, roasted then ground
  • ¾ teaspoon cayenne powder
  • ¼ teaspoon black pepper
  • 2 ½ teaspoon salt
Instructions
Making Tamarind Water/Puree
Carefully cut the tamarind block into eight equal pieces. Place the tamarind into a deep medium-sized bowl and cover with the hot water. Let soften for five minutes and then use a potato masher, back of the spoon or even your hands to break and mash the pulp pieces. The tamarind pulp will begin to dissolve into the water and separate from the fibrous husk and seeds. Soak the tamarind for 20 more minutes. Strain the pulpy water through a fine meshed strainer, using the back of a spoon (or your hands) to extract as much pulp as possible. Discard the fibrous husk remaining in the strainer.

Finishing the Tamariand Chutney
Place the strained tamarind pulp, jaggery, roasted and ground spices, and salt into a saucepan. !Bring to a boil, lower the heat to medium and simmer for 5 minutes. Reduce the heat to low and cook for another 5 minutes. The mixture should be slightly thickened and shiny. If the mixture becomes too thick, add water as necessary. If it's too thin, bring the mixture back to a boil for a couple of minutes to let some of the water evaporate.
Notes
Jaggery is dehyrdated sugar cane juice primarily made by small cultivators in rural villages. It has a smoky caramel flavour which is hard to substitute, although brown or dermera sugar is the closest equivalent.

NOTE: This was originally posted on my blog India On My Plate on August 12, 2011

Green Coriander and Mint Chutney

Green Coriander and Mint Chutney
Serves: makes about 1½ cup
 
Variations of this refreshing chutney are ubiquitous among street food vendors in all corners of India. Although its bright colour and flavour are best when freshly made it can be refrigerated for up to a day.
Ingredients
  • 2 cups coriander leaves
  • 1 cup mint leaves
  • ½ cup medium onion, diced
  • ½ cup tomatoes or 1 Roma tomato, diced
  • Juice of 1 lemon
  • 2 teaspoons sugar
  • 3 green chillies, seeded chopped
  • Salt to taste
  • 4-6 tablespoons water
  • ½-1 teaspoon chaat masala (optional)
Instructions
Pick the mint and coriander leaves from the stems. Roughly chop the leaves to make the blending process easier.
Place the tomatoes, onions, chillies, lemon juice, salt, sugar, and chopped herbs into a blender. !Blend and add the water gradually until the ingredients start to puree. You may need to turn the blender off and scrape the sides down with a spatula a couple of times to ensure all of the ingredients are pureed.
Notes
In order to get a well pureed chutney I prefer using a blender. If you do not have one you could use a small food processor but the result may be slightly more coarse and chunky. Make sure that you finely chop the onions and chillies before placing into the food processor so as to minimize having large pieces in the finished chutney.

NOTE: This was originally posted on my blog India On My Plate on August 12, 2011

Zucchini Flower and Vegetable Fritters

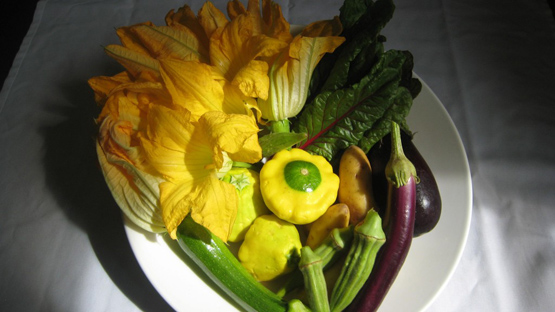
Ingredients for zucchini flower Orissa style Chickpea FrittersThis past Sunday, during my weekly visit to the Landsdowne Farmer’s Market I spotted some bright yellow zucchini flowers and some perfect finger length okra from Acorn Creek Farms.  Seeing these vegetables reminded me of my first trip, a year and a half ago, to Orissa, along the east coast of India. My friend, Jason, had introduced me to Debjeet from Living Farms– an organisation working to provide food sovereignty for the small and marginal farmers in India. Luckily, I connected with Debjeet in Bhubaneswar and he took me to a restaurant which specialized in Oriya food.  We had a flavourful lunch of mustard coated fish and prawn curry (harvested from the brackish waters of nearby Chilka Lake) some fried okra spiced with panch phutana (cumin, mustard, fennel, fenugreek and kalonji) and a battered then fried pumpkin flower.  I was pleasantly surprised to be served the pumpkin flower as I am aware of the seasonality of such a form of the vegetable. I am accustomed to preparing zucchini flowers in a French or Italian style but this was the first time I had seen it used in an Indian kitchen.

I’m not sure if you have the same problem but often I end up with little amounts of vegetables left in my fridge.  This inevitably happens the day that I am to receive my CSA box and I need to find a way to use up the remnants from the previous week’s delivery.  Tidying up to make room for the freshly harvested vegetables I found the forgotten okra and zucchini flowers (still in good shape as I had stored them in the butter compartment in the door).  Instead of making a mixed vegetable pasta, soup or dal I decided to make a quick tea time snack using the neglected and leftover vegetables.

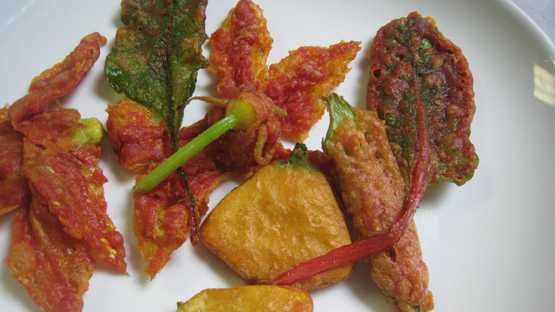
The recipe may appear lengthy but it is very easy. Consider it an Indian version of tempura, most often called bhaji or bhaja. Essentially, it is similar to a pakora but this time relatively thin slices of the vegetables are dipped into a chickpea and rice flour batter (crepe like consistency) and then fried until golden brown. It is best to make your accompanying chutney before you prepare the fritters.

Orissa style zucchini flower and patty pan squash chickpea fritters

Zucchini Flower and Vegetable Fritters
 
Ingredients
  • Batter Recipe
  • ½ cup chickpea flour (you can use just chickpea flour but I find the rice flour adds a nice crispness to the fried batter)
  • ½ cup rice flour
  • ¼ tsp baking soda
  • ½ tsp turmeric powder
  • ½ tsp cayenne powder
  • ¾ tsp salt
  • 1 cup water
Instructions
In a large mixing bowl stir together chickpea flour, rice flour, baking soda, turmeric and cayenne powders, and salt. Gradually pour water into the mixing bowl and whisk briefly to remove any lumps and the mixture is smooth. The batter should be the consistency of cream. If you feel it needs to be a bit looser start by adding one or two tablespoons of water until you achieve your desired consistency. (If the batter sits a bit (ie 20 minutes or so) you will most likely need to do this.

Fill a karhai, wok, or heavy bottomed saucepan (one with high sides, such as a pot you would use for boiling pasta) one third full with vegetable oil. Heat the oil over medium heat to 350F (180C). If you do not have a deep fry thermometer heat oil and test with a small cube of bread. If the bread cube lightly browns in 10 seconds the oil is ready to use.

Vegetables:
Zucchini flowers: Leave the steam in if possible as it is easier to dip into batter. Lightly brush off any dirt particles. Also look inside as bees love to gather nectar from the inside of the flowers.
Swiss Chard, Spinach or Beet Greens: Wash well in water and gently dry with kitchen towel. Leave a length of stem/rib as it is easier to dip into batter and then oil.
Eggplants: Slice ⅓ inch thick
Potatoes: Slice ¼ inch thick
Pumpkins: Peel and slice ¼ inch thick
Sweet Potato: Peel and slice ¼ inch thick
Pumpkin or squash: Peel and slice ¼ inch thick
Zucchini or Patty Pan: Peel and Slice ⅓ inch thick

Dip about 7-10 pieces of a single vegetable into the batter and carefully slide each individual piece into the hot oil. The vegetables should not be too crowded in the oil. Cook for about 3 minutes per side. Using a slotted spoon carefully turn over the vegetable pieces. Sometimes you can use the spoon to push the pieces under the oil, if need be.
When both sides are golden brown, use a slotted spoon or mesh strainer to remove the fried vegetable and drain on paper towels.
Repeat with the rest of the vegetables, cooking each vegetable separately. Serve hot with [url:1]green chutney[/url] or [url:1]tamarind chutney.[/url]
Notes
Cook the zucchini flowers or swiss chard last as they cook more quickly (in about a minute). Also, it is important to coat the zucchini flowers or swiss chard leaves with enough batter for them to be crispy rather than oily.

NOTE: This was originally posted on my blog India On My Plate on August 12, 2011

Cabbage Raita with Peanuts and Cayenne

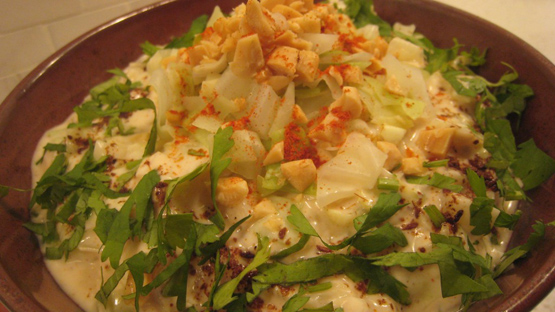
Cabbage raita as part of an Indian mealMy CSA box this week overflowed with brilliant rainbow swiss chard, new potatoes, carrots, fresh coriander and two heads of green cabbage. I’m not sure about you but every time I see a head of green cabbage I immediately think of coleslaw or sauerkraut. Leafing through some recipes I searched for some new inspiration to transform this humble vegetable. I thought of pickled spiced cabbage but needed something quick  and easy to make to accompany dinner.  I decided to adjust an interesting cabbage raita recipe (instead of the typical cucumber raita) which has the feel of belonging to the Gujarati or Maharastrian kitchen due to its garnish of peanuts.  Raita, like a pachadi, is the northern version of a cooling yogurt ‘salad’ or sauce accented with some vegetables or fruit. Serve it with a simple dal or grilled meat (beef or pork) or favourite curry.

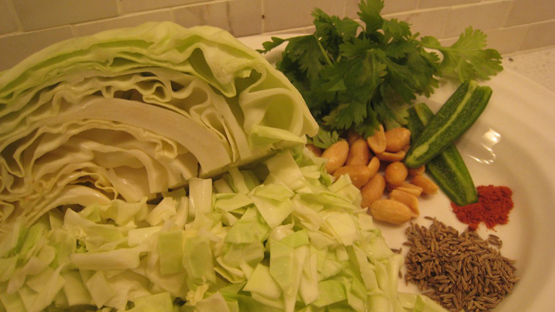
Ingredients for cabbage raita with peanuts

Cabbage Raita with Peanuts and Cayenne
Serves: 4
 
Ingredients
  • 3 cups diced green cabbage (half a cabbage)
  • 1 ½ tsp cumin seeds, roasted and crushed
  • 1 tbsp peanuts, toasted and crushed
  • 2 cups plain yogurt
  • ½- 1 tsp cayenne powder (depends on personal 'heat' level)
  • 1 tsp sugar
  • 1 green chilli, finely chopped
  • Salt
  • Coriander for garnish
Instructions
Bring pot of salted water to boil. Turn off heat. Add diced cabbage, cover and let sit in warm salted water for 10 minutes. Drain and dry with towel or let air dry for 15 minutes, shaking off excess water. In a large bowl, mix cabbage with yogurt, most of the cumin seeds (save some for garnish), half of the peanuts, most of the cayenne, sugar and green chilli. Season with some salt and mix well. Place in a serving bowl and garnish with the remainder of the peanuts, cumin, pinch of cayenne and coriander.

This cabbage raita can be made up to a day in advance and refrigerated.
Notes
Recipe adapted from India; the cookbook by Pushpesh Pant.

 NOTE: This was originally posted in my blog India On My Plate on August 5, 2011