 Each family has a picky eater. Our four and a half year old son is ours. The last few months he’s been branching out of his limited preferences. He’s doing so in part because we finally clued in that he likes his umami. So, our weekly menu has shifted a bit to ensure that there are more ‘Asian’ flavours. A month or so ago, he heartily announced, mid bite, that he loved rice, all kinds (we have since learned this really only means any type of white rice as the brown, red or black rice he’s been served is barely touched). It was with this knowledge that I knew I could get him to come with me to visit the “Rice Experience” Tour at Living Land Farm in Luang Prabang, Laos.
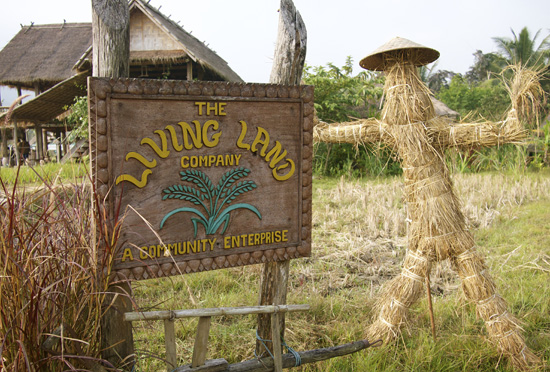
Located 5 km outside of Luang Prabang, the Living Land Farm, a cooperative comprising 7 families who primarily grow rice over 8 hectares, was conceived in 2006 by Laut Lee in response to the slash and burn farming culture in the rural regions of Laos. Slash and burn farming involves clearing vegetation by cutting and burning before being used for just one or two seasons to grow upland rice, vegetables or fruit. After cultivation the land requires a minimum of 3 years of fallow before being used again. So farmers frequently move and clear new land. During the last few decades it has led to increased deforestation, soil erosion and loss of soil fertility. Laut explained that the majority of farmers in Northern Laos live in rural areas where this type of subsistence agriculture has been practiced for generations and they are not aware of other farming alternatives. At the same time, farmers who are closer to cities are increasingly using fertilizers and pesticides without full knowledge of the harm they can do to humans and the environment.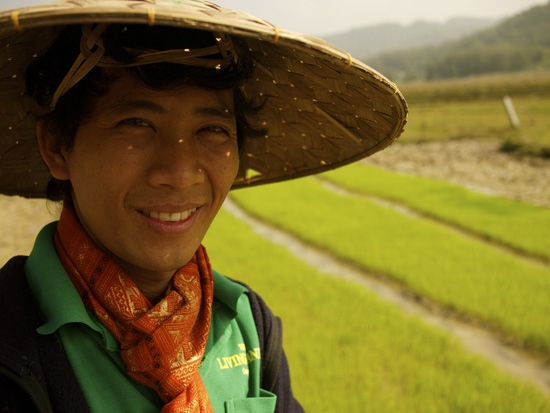
While at university training to be a teacher Laut realized that if he educated the younger generation of kids and farmers about traditional organic farming techniques he could possibly make a difference. So, in collaboration with the Department of Agriculture and Forestry of Luang Prabang schoolchildren take fieldtrips to the farm to learn about different planting techniques that do not require the use of fertilizers or pesticides. The top college students in the agriculture program receive hands on training in crop rotation, working with green manure and natural pest management. The ultimate goal is to show the local Lao students that they can farm the same piece of land continually while keeping it fertile and alive by using a host of sustainable techniquesLaut also recognized that with the increase of exclusive hotels in Luang Prabang there would be a need for organic Western vegetables. Two years ago, a couple of guests from an upscale hotel were taken with the vegetables used in their meal and wanted to see where they were grown. While walking them around the farm during this informal tour Laut described the 14 steps of the rice growing process. And so the ‘Rice Experience’ tour was born.
As I am not aware of any other organized hands on tour that explains how rice is grown, if you find yourself in Luang Prabang I highly recommend setting aside a half day to experience Laut’s enthusiasm and knowledge. Here is a link to a video interview I did with Laut on Good Food Revolution.
Step 1: Selecting the grain
Rice grains from a previous harvest are selected by placing them in a saltwater solution (enough salt to float a raw egg). Those that sink are deemed healthy and resilient enough to be planted. They first must be well washed to rinse away the salt, which if left as residue on the grains will inhibit germination.
Step 2: Germination and nursery station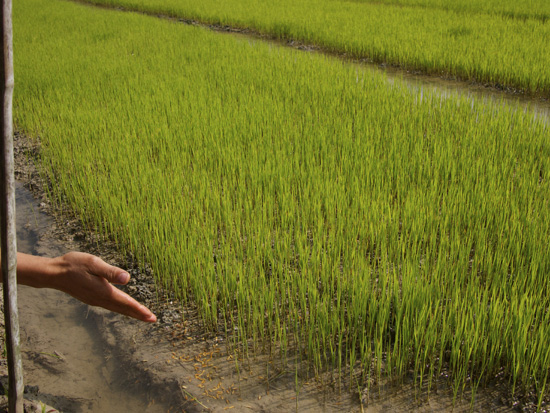
The selected seeds are spread in assigned beds for germination.
Step 3: Ploughing
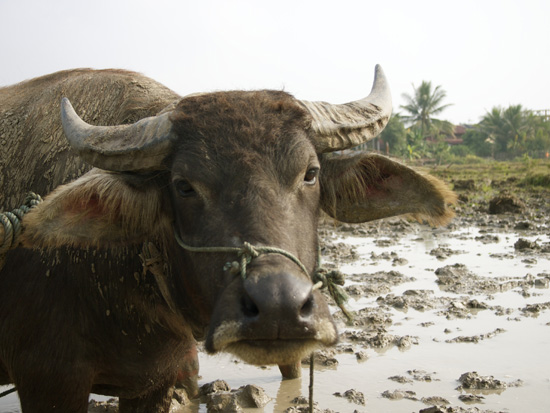
Susan the Water Buffalo
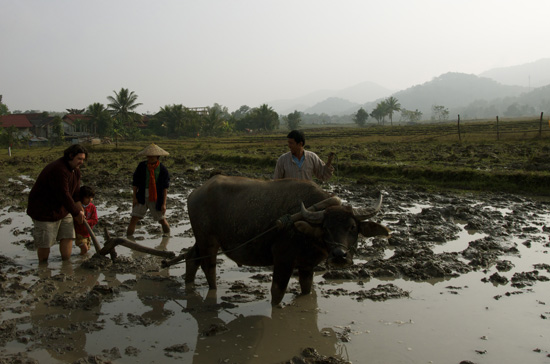
My son and I get our feet muddy as we plough the field with Susan’s help.
The rice paddy is ploughed to prepare for planting. Traditionally, water buffalo are used to assist in the ploughing. Farmers living closer to larger cities will use a ‘mechanized buffalo’ as Laut refers to mechanical ploughs.
Step 4: Planting of Seedlings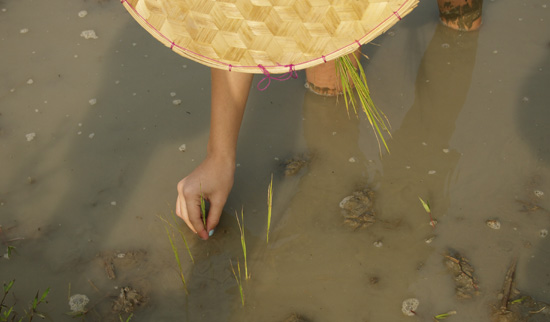
Family and community members work together to help each other plant the seedlings in their paddies in rows. To help pass the time of this back-breaking job traditional songs are sung in between the men and women.
Step 5: Managing Water & Weeding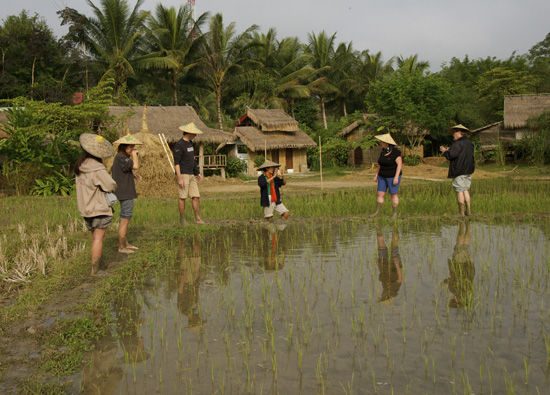
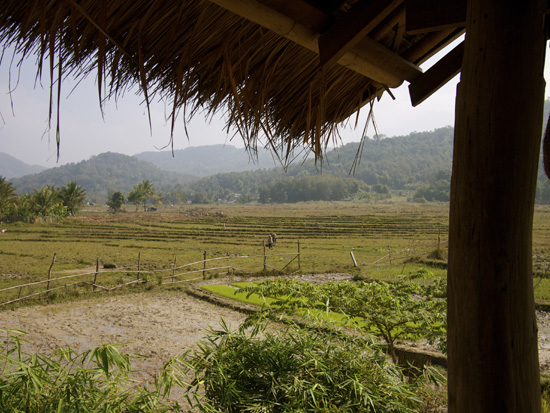
As the rice grows managing the access, amount and flow of water is paramount to providing optimal growing conditions. Similarly some weeding of encroaching unwanted vegetation is required. Depending on the variety of rice that is grown this stage will last from two to four months.
Step 6: Harvesting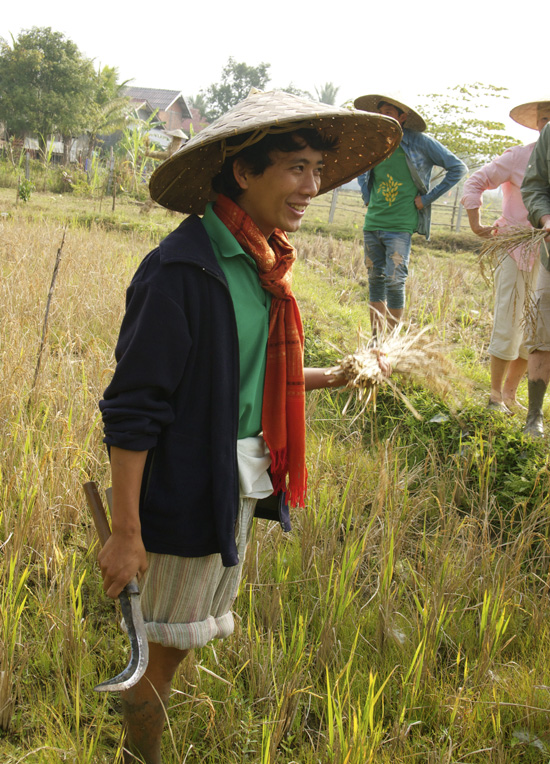
Once the farmer has deemed the rice is to be harvested it must be done within a period of two days to one week. If time is wasted some of the grains may fall into the paddy and will be unusable.
Step 7: Thrashing
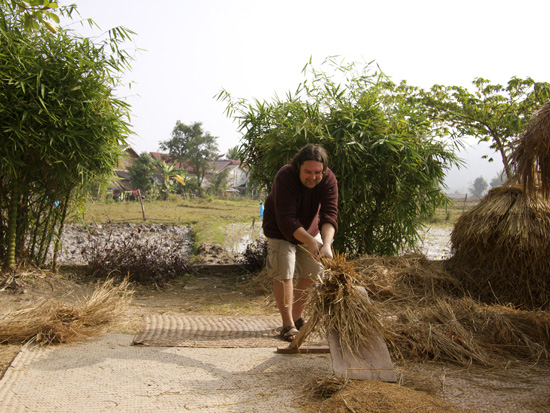
My son was proud as he took this photo of me thrashing rice
Once the rice has had some time to dry a little the grains are thrashed against a board to release them from the stalks. Laut showed us a technique where a nunchuk like device is used where a string attached to two batons is wrapped around a bunch of stalks and then beaten against a wooden board.
Step 8: Winnowing & Cleaning
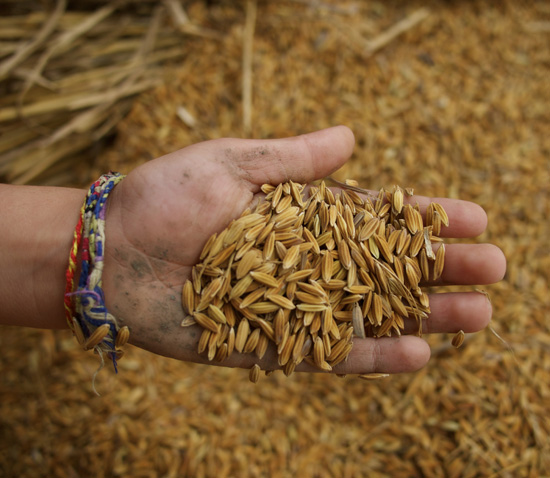
A large fan is moved in a figure eight motion to separate the straw and empty rice husks. The rice is spread out and moved around as the winnowing occurs. We all thought that the rice would simply be blown around however since the straw and empty husks are lighter than the rice kernels it was them who were blown around instead.
Step 9: Packing & Storing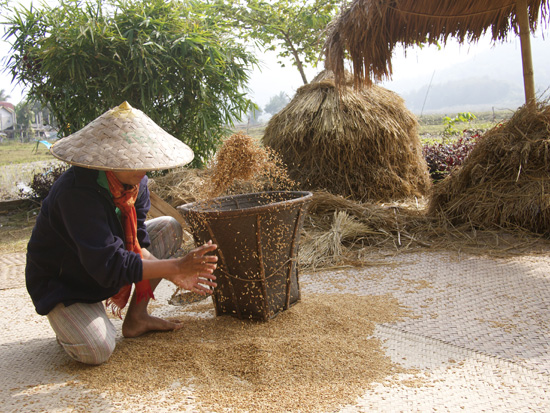
The rice is then loaded from the winnowing station into baskets holding up to 40 pounds of rice and transported back to the farmer’s home where it can be stored up to two years.
Step 10: Husking
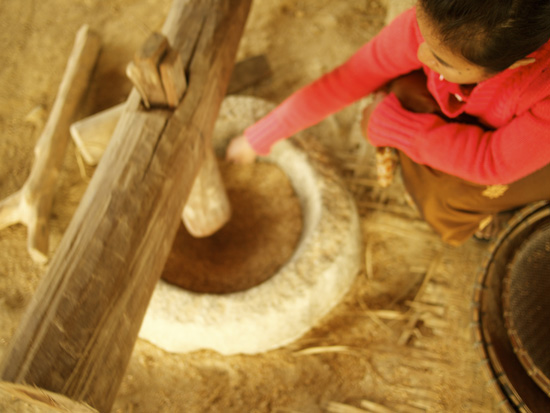
Using a foot powered ‘mortar and pestle’ contraption the rice is repeatedly pounded so that the husks are released from each grain of rice. It helps to have someone sit near the bowl and move the rice around so that all of the husks are removed.
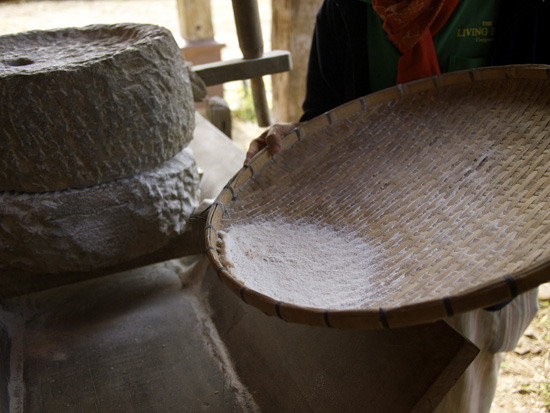
Step 11: Winnowing Grain from Husk
For some reason -Laut never got around to explaining why – the winnowing of the grain is only performed by women or girls. I suppose this is because they may be more patient at separating and removing the husks from the grains of rice. The technique is to place your hands on the centre of each side of the woven bamboo tray and move it straight up. If done properly, the movement and wind will help blow away the lighter husks while the heavier rice falls to the tray. If performed by a novice, as one of the other tour participants discovered, you may end up with some husks and rice down your shirt.

Step 12: Soaking Rice in Water overnight
The rice needs to soak for a minimum of 6 hours or overnight before cooking.
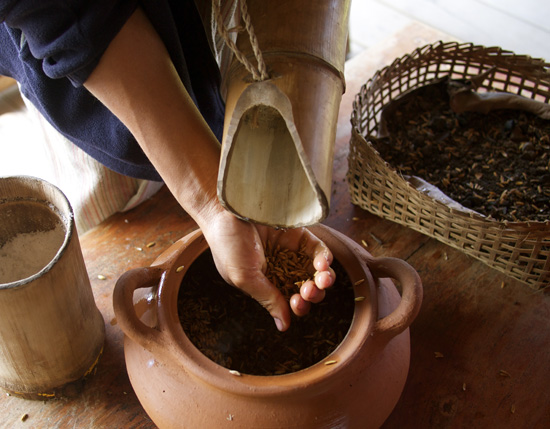
Step 13: Cooking
The soaked and drained rice is put in a conical like bamboo basket, called a houd, that sits on top a pot of simmering water. It is steamed for 20 minutes and then instead of stirring the rice, with one skilled shake the rice flips 180 degrees with the rice that was on the top now on the bottom closer to the steam. Unlike stove top methods, there is no real need to cover the rice in the steaming process, but a bamboo cover is used to keep out ash, dust and bugs while it cooks.
Step 14: Eating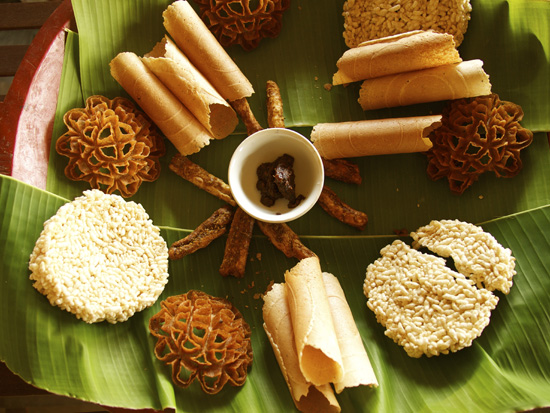
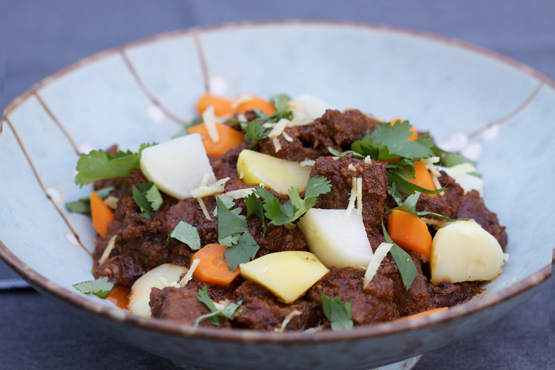
At the end of the tour we sat down to eat some of the delicious steamed rice with a fiery buffalo meat chutney. We were also served rice in other delectable forms: rice crackers, rice coconut milk like tuiles.
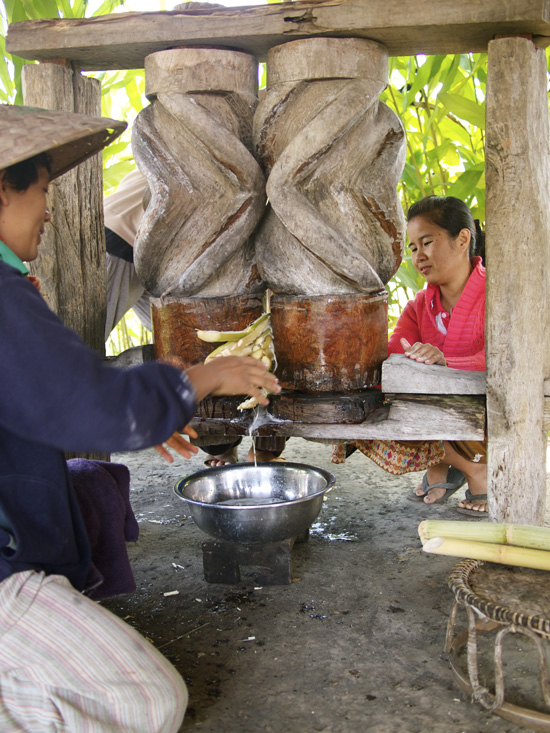
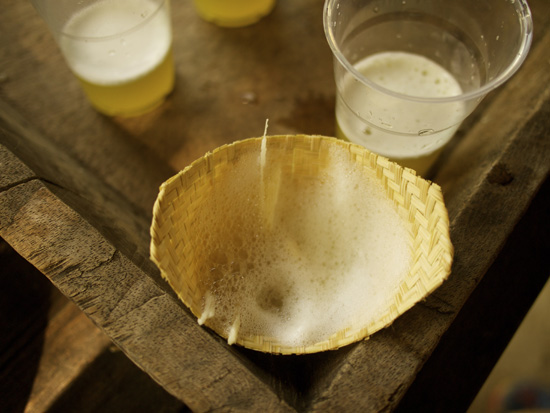
Laut and his team also used a traditional press to squeeze out some delicious sugar cane juice. The sweet foam from the top was fantastic as the tiny bubbles melted in my mouth. A great way to finish off the tour.