Guava Banana Coconut Bread

guava banana coconut bread and fresh guavas

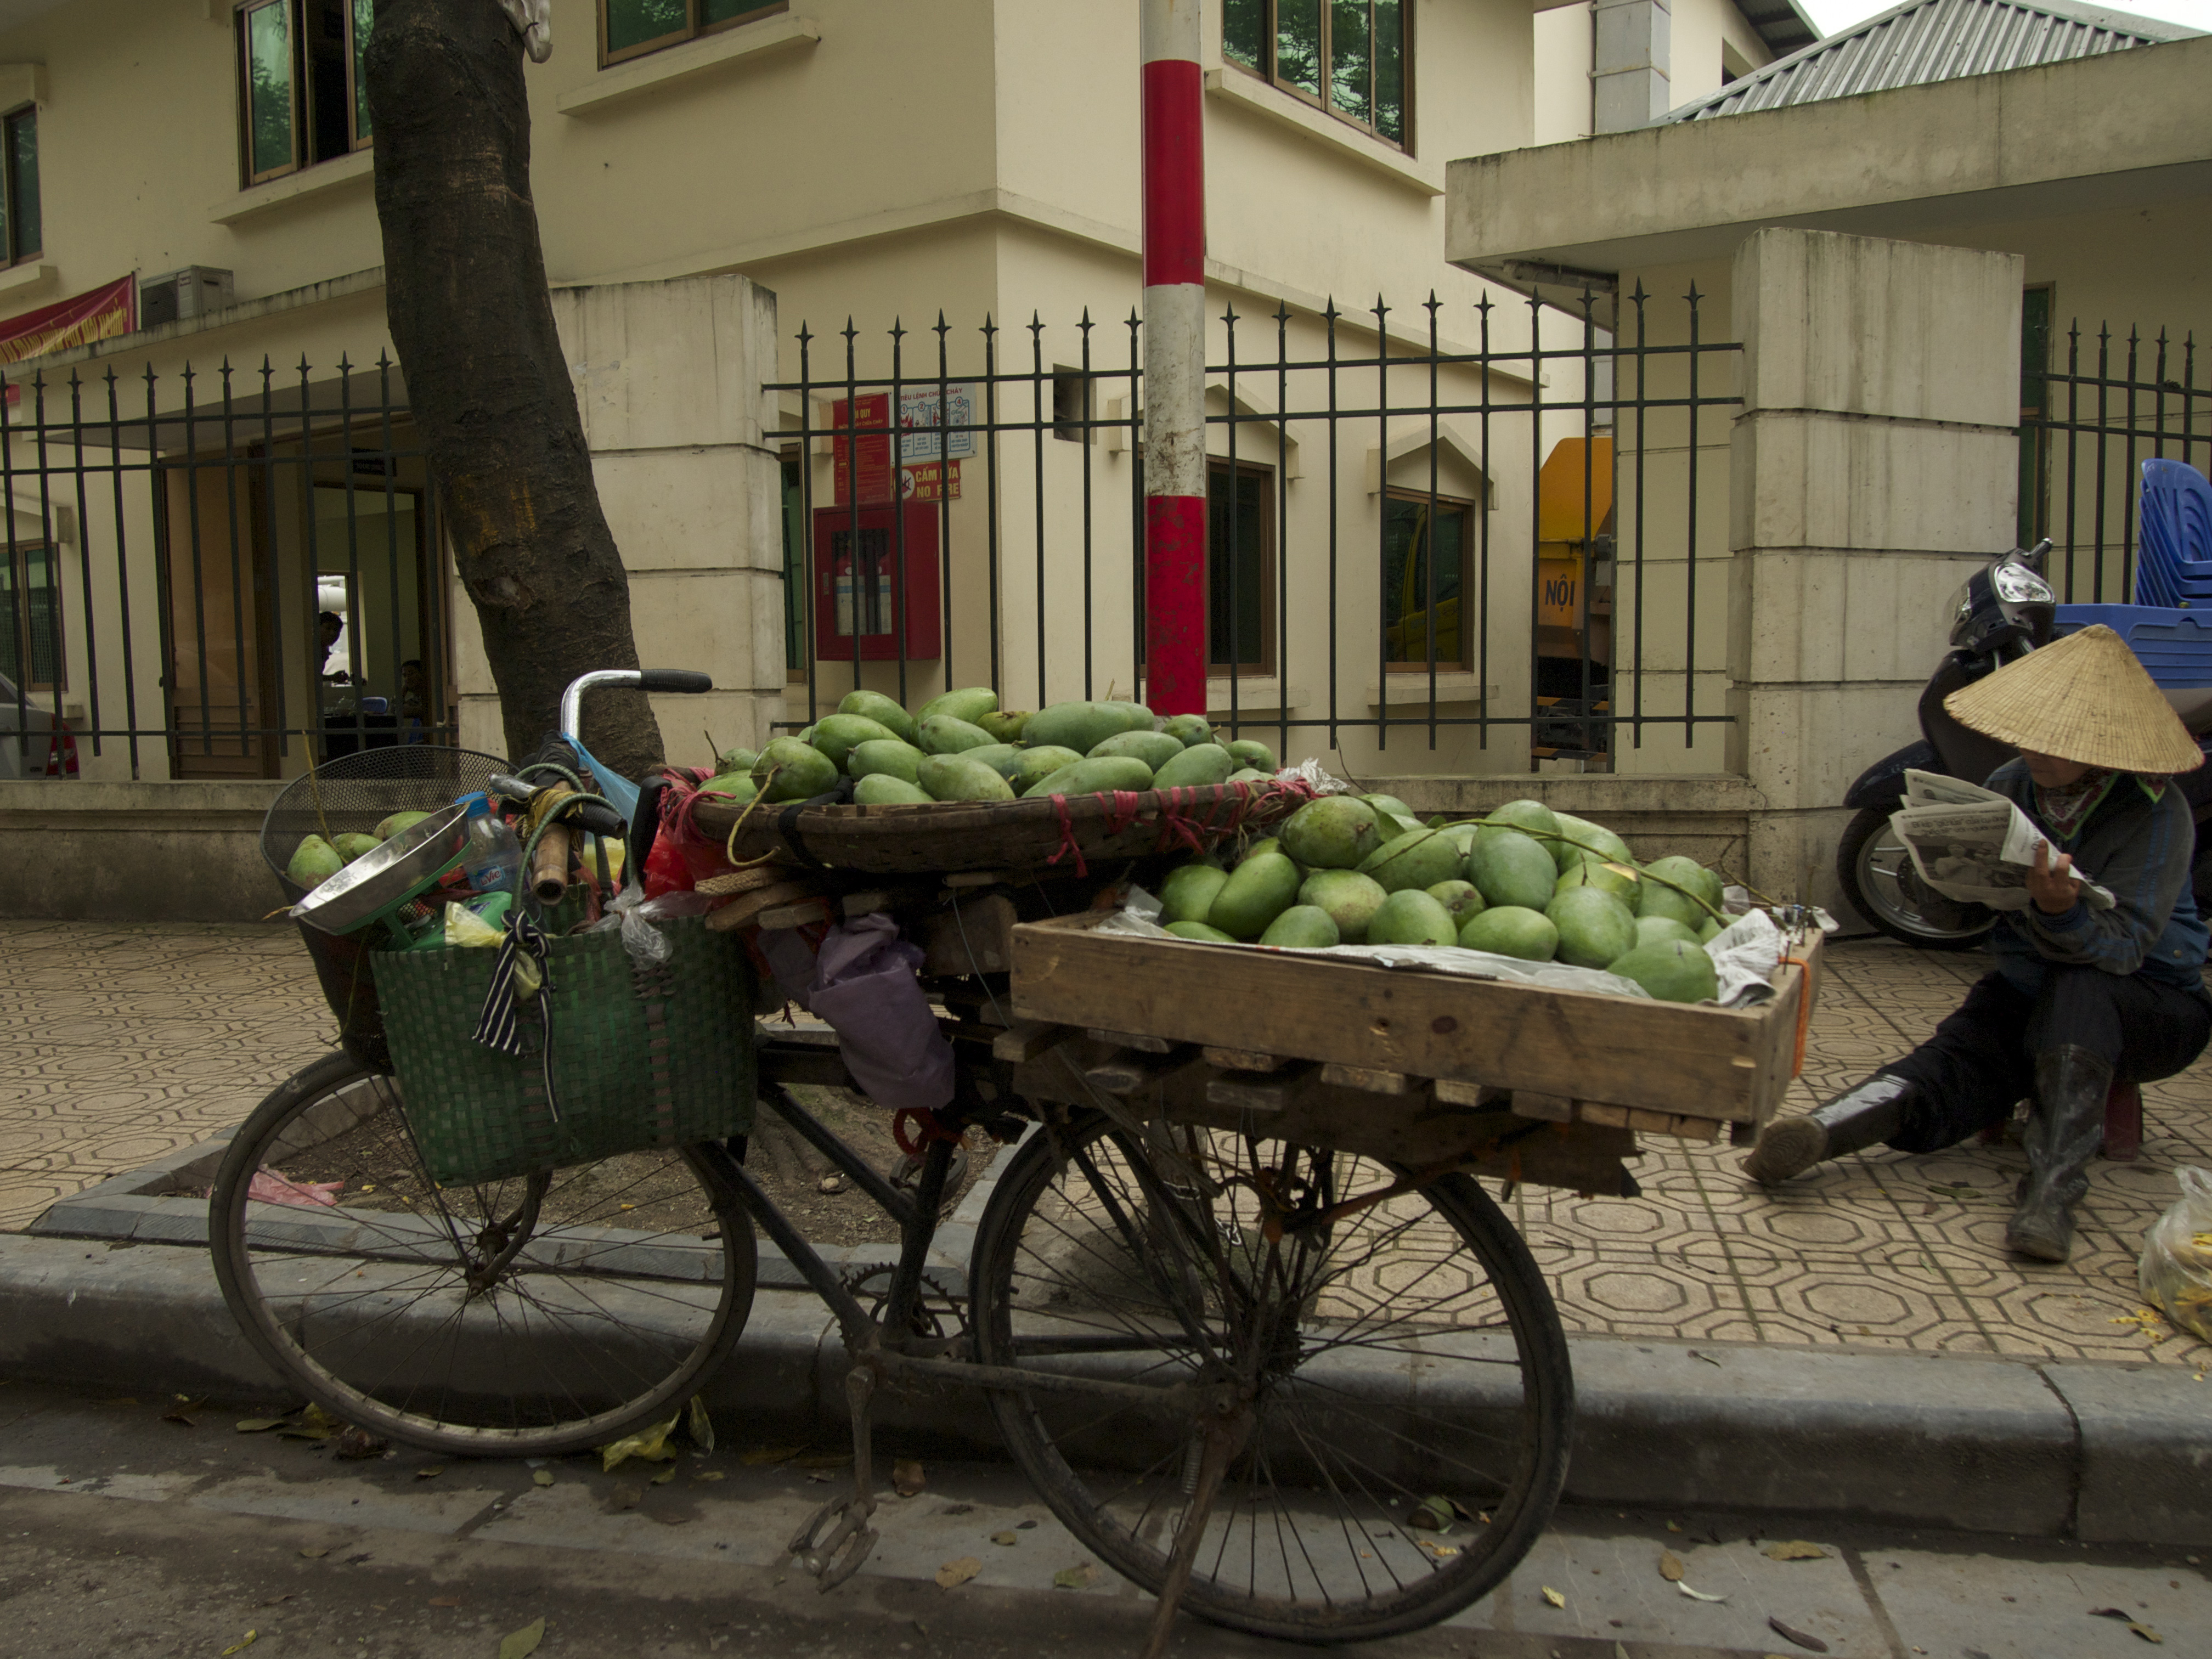
It’s been a month and half since I was on the streets and in the markets in Hanoi. The fruit vendor’s bamboo baskets have changed but maintain a similar shade of green from the unripe mangoes in June to the granny smith green guavas of early August.

Yesterday was the last day of summer holidays and Ms. Ten Year Old wanted to bake something for her snack for the first day of Grade 5. The abundance of guavas sprang to mind and I thought about adapting our carrot bread recipe but could not find any large, apple-sized guavas and had to settle for the plum-sized ones instead. Since the smaller guavas could not easily be grated without including some of the populous seeds I turned to a banana coconut bread recipe in Naomi Duguid’s Homebaking that requires 3 cups of pureed bananas for inspiration.

The variety of guavas I used are unripe/semi ripe and are to be eaten that way, like an apple. So I needed to first make a puree before continuing with the remainder of the recipe. I’m also a sucker for a crunchy crumb topping on my quick breads or muffins and had some leftover in the freezer from a large batch baking session back before I left. That topping had oats instead of the coconut I have suggested in the recipe below.

Guava Banana Coconut Bread
Serves: makes 2 loaves
 
Ingredients
  • 2 pounds (1 kg.) green unripe/ semi-ripe guavas
  • 2 ½ cups all-purpose flour
  • 1 ½ cups whole-wheat flour
  • 2 teaspoons baking powder
  • 2 teaspoons baking soda
  • 1 teaspoon ground cinnamon
  • 2 or 3 ripe bananas (depending on size), mashed to make 1 cup of puree
  • ½ pound (225 grams) unsalted butter, room temperature
  • 1 ½ cups of sugar
  • 2 eggs
  • 2 teaspoons vanilla extract
  • 1 cup unsweetened grated coconut

Crumb Topping:
  • ⅓ cup brown sugar
  • ¼ cup all-purpose flour
  • ¼ cup unsweetened grated coconut
  • 4 tablespoons unsalted butter, chilled
Instructions
  1. Preheat the oven to 350F/180C. Grease and flour two 9 X 5 inch loaf pans.
  2. Peel and roughly chop the guava. Place in a medium sized pot with 1 cup of water. Bring to a boil, cover, lower the heat to medium low and cook for about 15 minutes. Check to see that all of the water has not evaporated (if it has add another ⅓ cup) and give a good stir to make sure that some of the guava has not stuck to the bottom of the pot. Recover and cook for another 15 to 20 minutes. The guava should now be soft. Transfer the guava to a blender and blend for about a minute until you have a puree.
  3. Set a fine mesh strainer over a bowl. Working in stages pour a third of the mixture into the strainer and use a spatula to press the puree through the strainer leaving the seeds behind. Repeat with the rest of the puree. Measure out 2 cups of puree into a medium sized bowl - this should be all of it; if you have more keep to make a nice smoothie; if you have a little less top up with some banana puree. Mix in 1 cup of banana puree and set aside
  4. As the guava is cooking prepare the crumb topping. In a small bowl use a fork to combine the sugar, flour and coconut. Add the butter in chunks and mix with back of fork or fingertips until coarse crumbs are formed. Set aside.
  5. In a medium bowl combine the flour, baking powder, baking soda and cinnamon.
  6. Using a mixer, beat the butter and sugar until light and fluffy. Add and mix in the eggs and vanilla extract. Beginning with the fruit puree, alternating with the flour mixture, stir in about one cup mixing until evenly combined. Once the puree and flour mixture have both been combined the batter should be smooth and evenly combined. Stir in the coconut.
  7. Spoon the batter into the greased loaf pans. Sprinkle each loaf with half of the topping.
  8. Place the pans on a baking sheet on a rack in the centre of the oven and bake for about 45 minutes or until the tops are golden and a cake tester/ toothpick inserted into the centre comes out clean. Transfer the loaves to a cooling rack removing from the pans about 30 minutes later. Allow to cool completely before wrapping tightly in plastic wrap.


Green Mango Mulberry Crisp

Green Mangoes and bicycle in Hanoi

At this time of year in Hanoi, green mangoes are everywhere. Not that I want to escape them but it seems that I can’t go two hundred feet without coming across a woman from the country side standing beside her bicycle with a bamboo basket full of green mangoes. Each green mango laden bicycle I pass prompts me to mull over potential recipes and flavor combinations. Should it be a spicy, Thai inspired salad, always a favourite or a small batch of sweet sour Indian green mango chutney equally good for an Indian meal or as an accompaniment for some good cheese or grilled meat?

Last week my wife had informed me that we were off to our friend’s house for dinner and that we needed to take dessert. That day was already quite packed and so I needed something quick and easy to make. Coming back from the market on my trusty red Vespa I spotted a basket of the elusive burgundy, scarlet and claret berries for which I had been keeping my eye out. The beginning of green mango season coincides with the very short mulberry season and so upon spotting the more difficult to find berries I immediately knew what I was going to make.

Mulberries in springtime

I bought a few handfuls of the mulberries and 3 green mangoes from another vendor just a few yards away and I was set. Keeping in mind that the dish would need to be child friendly, I decided to add a couple of apples to the mix. I had tricked my kids earlier in the week by serving them a green mango mint cooler, aam pudina panna, by leaving out the ‘green’ in the name but I wasn’t sure that they were going to want to eat this dessert if there wasn’t something in the title that they were familiar. Plus, I wanted something slightly sweet to counter the tartness from the green mangoes and the mulberries. The apples would also add some needed pectin to the dish. To the crust I added some freshly grated coconut to bring a tropical nuttiness to the dish.

In the end the older kids, ages 8, 10 and early 40s devoured the dessert but the two 5 year olds weren’t so interested. Don’t make the mistake I did which was forgetting some vanilla ice cream to disguise fact that there were some fruits the younger kids weren’t fully comfortable with. If you are living outside of Asia for the next few months you should be able to find some green mangoes at your local Asian shops. As different berries, or even rhubarb, come in season you can easily substitute them for the mulberries.

Green Mango Mulberry Crisp
Serves: 8
 
Ingredients
  • 2 cups mulberries
  • 2 pounds (1 kg.) or 3 whole green mangoes
  • 2 sweet apples
  • ½ cup sugar
  • 2 tablespoons instant or pearl tapioca (or substitute same amount of tapioca flour or regular flour)
Crisp Topping
  • ⅓ cup oats
  • ½ cup grated coconut, unsweetened
  • 1 cup flour
  • ½ cup sugar
  • ½ cup brown sugar
  • ¾ teaspoon ground cinnamon
  • ½ cup cold unsalted butter
Instructions
  1. Preheat the oven to 375F/ 190C.
  2. Cut off any small twigs, if any, from the mulberries. Fill a large bowl with water, add the berries and swish them around gently with your hands to loosen any dirt. Wait a minute for the dirt particles to sink to the bottom and using a slotted spoon, spider or your hands remove the mulberries to a waiting dish. Drain the water, rinsing away any settled dirt and wash the mulberries one more time. Drain well and set the mulberries in a large bowl.
  3. Peel the green mangoes and cut around the large flat pit to get two halves plus a few other smaller pieces. Cut the halves and other pieces into 1 ½ inch cubes. Place over the mulberries in the large bowl.
  4. Peel and core the apples and cut the apples into 1 inch cubes. (Note: the mango chunks should be larger than the apples so that the more tender mango pieces do not overcook by the time the apple pieces are soft and tender) Add to bowl of cut fruit.
  5. Sprinkle the sugar and tapioca pearls, or flour if using, over the fruit and gently toss to mix well. Transfer the mixture to an 8 by 11 inch baking dish (or one that holds the 8 cups of cut fruit).
  6. In a medium bowl, toss the oats with the coconut, flour, white and brown sugars, and cinnamon. Grate the butter, using the large holes of a grater, over the flour mixture. Alternatively you can cut the butter into ½ inch cubes and toss into the flour mixture. Using your fingertips, mix the butter until the topping has pea-sized crumbs. Sprinkle the topping evenly over the fruit.
  7. Place the filled baking dish onto a tray and into the middle level of the preheated oven. Bake for about 35 to 45 minutes or until the top is golden brown and the fruit is starting to bubble around the edges of the dish.
  8. Let the crisp cool for 30 minutes before serving. Serve with ice cream (vanilla or ginger) or whipped cream.


Sautéed Amaranth Leaves with Coconut (Tamdbi Bhaji)

Woman holding amaranth greens at Karwar market in state of Karnataka

Photo by Jason Taylor

I have just returned from a lovely two weeks relaxing, and of course cooking, with family and friends at a couple of cottages.  One day we left Horseshoe Island to check out the local farmer’s market.  Strolling through the predominantly caucasian market we came upon an elderly Chinese women and her daughter selling mom’s garden harvest of Chinese chives and greens.  I inquired about the red-purple and green amaranth and the daughter responded that she had no idea what it was but translated her mother’s directions on how to cook it. I was amused by her response but was slow in asking for a bunch as the last couple were snapped up by other eager cooks, and so I left empty handed. Later that afternoon my friend’s sister-in-law returned from her shopping with what she described as beautiful ‘red kale’ and asked me how we could prepare it.  She had already decided to give our meal a Mediterranean theme so I taught her a quick Italian recipe with the rainbow swiss chard, not kale as she had thought.

While preparing dinner together I shared with her my amaranth market story and also how during the winter and monsoon seasons the wet markets of South India offer a similar variety of bright leafy greens (of which the above picture, by Jason Taylor, shows a Konkani woman shopping in the Karwar market).  She was curious to hear that South Indian cooks enjoy adding green and red amaranth leaves to soups, dals, or even making fresh chutneys out of them.  My market experience demonstrated that increasingly amaranth leaves are being grown and sold at farmer’s markets because they grow easily, are hardy and highly nutritious but cooks are unsure of how to prepare them.  I told my cooking companion that if they are unavailable beet greens, swiss chard or spinach are wonderful substitutes.  Excited to learn more recipes with leafy greens I promised to share with her a quick Indian dish which highlights their freshness. So here it is my new friend- something that Marty definitely cannot do!

Sautéed Amaranth Leaves with Coconut (Tamdbi Bhaji)
Serves: 4
 
Ingredients
  • 1 bunch (4 cups) red or green amaranth (beet greens, swiss chard, or spinach)
  • 1 medium onion, thinly sliced
  • 3 garlic cloves, finely chopped
  • 2 green cayenne chillies, seeded and finely chopped
  • 2 tablespoons vegetable oil
  • Pinch of turmeric
  • Salt, to taste
  • ⅓ cup grated coconut (fresh, frozen or dry unsweetened)
Instructions
Wash the amaranth leaves a couple of times in running water in order to remove any dirt or grit. Drain, cut off any of the tough bottom parts of the stalk and discard (if using swiss chard, chop finely the larger part of the stalks). Roughly chop the trimmed greens into bite sized pieces.

Heat the oil in a sauté pan over medium high heat. Add the sliced onion and cook for 2 minutes. Reduce the heat to medium and cook until the onions are soft and golden, about 5 minutes. Add the chopped garlic and green chillies to the pan and continue to cook for another 2 minutes. Toss in the chopped amaranth and a pinch of turmeric. Mix well, cover and cook for about 4 minutes until the leaves are wilted and tender. If using spinach, the cooking time will most likely be halved. Remove the lid and continue to cook in order to allow any excess moisture to evaporate. Add the grated coconut, salt to taste, and sauté for another minute. Serve immediately.
Notes
Variations:

With Shrimp:

Many Konkani cooks like to toss in some sweet, tiny shrimp close to the end of cooking.

1 cup small raw shrimp (or medium shrimp roughly diced) cleaned and deveined

Add the shrimp at the same time as the grated coconut and cook until the shrimp has changed colour and is just cooked through.

With Chickpeas

If you have some extra cooked chickpeas, black eyed peas, or kidney beans leftover in the fridge, toss in about a half cup of them into the pan when adding the greens and then continue accordingly.

NOTE: This was originally posted on my blog India On My Plate on August 4, 2011